Last updated on September 27th, 2021
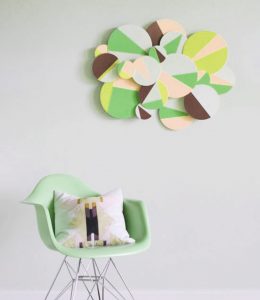
When it comes to decorating a wall, we prefer relying on wall art to bring in dimension and drama in the room. And what better way to do that than creating some3D geometric wall art! Check out this super-easy 2 step DIY Geometric Wall Art.
All You Need:

Wooden circles in different sizes
Acrylic paint in various shades
Paint Brushes
Blue Painter’s Tape
Dowel rods (1/2 inch thick)
A small saw (to cut the dowels)
Silicon Glue
Sheets of 1/8″ – 1/4″ hardboard or plywood
Hammer and nails
Step 1:

To begin with this project, start by applying painter’s tape of various shapes to a single wooden circle. While applying the tape, make sure that you press the edges of the tape for a crisp line, after the finish. Once done, paint the insides of the taped area of the wooden circle in various shades and let it dry. Once dry, remove the tape. Now, repeat the same process on the other wooden circles.
Step 2:

Now, it’s time to cut the dowels. Utilizing a cutter or a saw, cut different lengths from the dowels. The dowels will decide how far away each circle will rest from the wooden frame that everything is connected with. You can also choose to attach few of the wooden circles straight to the frame, without any dowel to amplify the 3D effect.
Step 3:

Now it is time to start sticking the dowels to the back of each circle. Turn all the circles and start attaching the dowels at the center, with the help of wood glue and let them dry. Now, attach the dowels to the wood base with some more glue. Let the whole piece dry for 24 hours before hanging.