Last updated on April 27th, 2021
If you have a knack for DIYs, then you must be aware of string art. This popular form of wall art is easy to make and gives you space to be creative. Additionally, you can also make it in different colors and shapes, and it makes for a stunning piece of wall art.

In today’s blog, we are sharing a super-easy and fun DIY string art that will take your crafting game to the next level. Check it out:
All You Need:

A wooden plank (we used a 15 inch plank)
Measuring Tape
Print out of a Mason Jar
String/Thread
Marker
Nails and Hammer
Paint
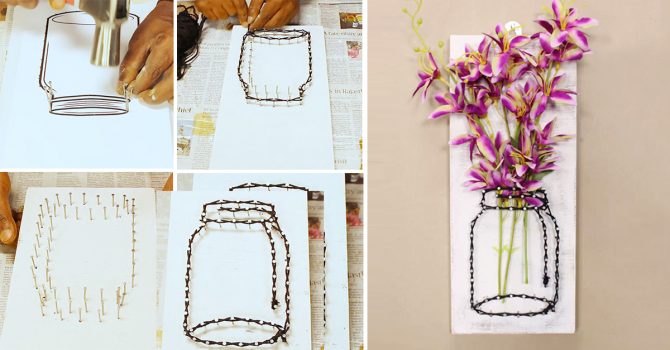
Step 1:
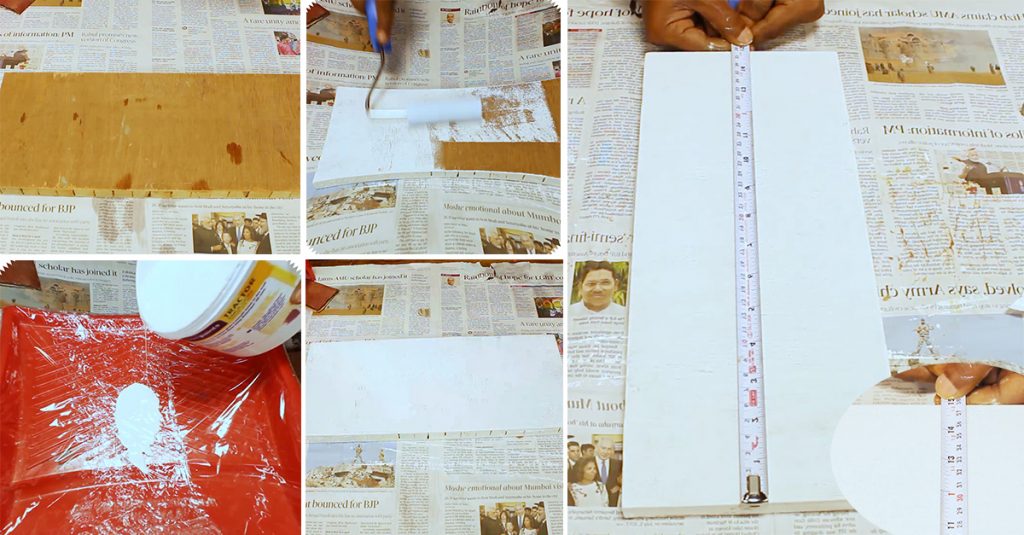
To begin with this DIY, start by painting the wooden block (we used white paint). Once done, place the mason jar print out over the wooden plank and secure it with tape. Now, outline the mason jar with the help of a marker.
Step 2:

Once done, hammer the nails over the outlined area. Now, remove the paper cut out and start wrapping the string art thread around the nail heads. And voila, your DIY string art is ready. You can use it as wall art or a gift for your loved ones.


